

The following is a guest post by Photographer / Blogger / Pilot extraordinaire Ed Graham of www.ThePolarRoute.com
Photographing food is incredibly challenging
Why? Because whenever a plate full of delicious awesomeness is placed in front of me, the only thing I can think to do is EAT IT! Taking a picture is almost always an afterthought, and that’s a real shame. I’ve been lucky to have tasted many interesting and amazing foods from around the world – lentils in India, brats in Germany, fried scorpions in China; the list goes on and on. I wish I had more pictures of it all. Don’t let that happen to you!
Treat food photography like any other form of picture-taking
The usual photographic basics still apply:
- find a unique angle
- compose a picture worth looking at (not just eating!)
- remove distractions

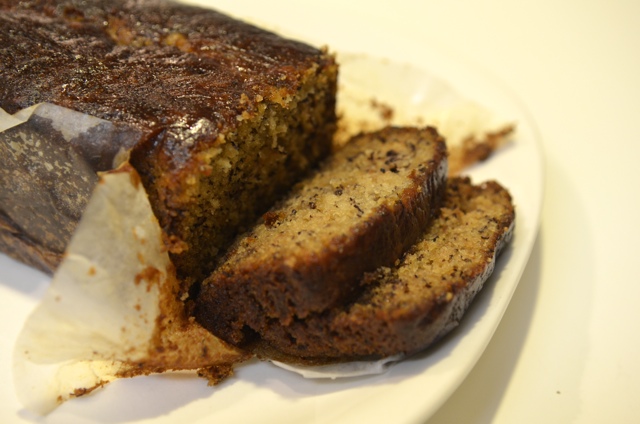
- A distracting photograph

Find a unique angle.
Food looks like boring, plain old food from eye level. That’s because everyone sees food from that angle. Give your viewer something interesting to see by placing your camera down low. Alternatively, try holding your camera directly above your food and shooting straight down. Finding unique vantage points can add a lot of spark to an otherwise plain photograph.
Compose a picture worth looking at.
Zoom in and get close and comfortable with your food. Focus on your most interesting point, and place that point according to the rule of thirds.
Remove distractions.
It’s easy to miss the obvious – avoid big distractions (like your shadow) in the background and on the food itself. If you’re able to adjust aperture on your camera, use the lowest setting you can. This helps blur the background and emphasizes your point of interest in the picture.
For the taco picture at the top of this post, I placed the camera low and close to the food. I zoomed in and used my lowest aperture at f2.8. I composed with the meaty part in the lower right third of the frame, and I removed distractions by placing the plate against a plain white wall.
Even though this taco was shot in a room full of distractions, the angle, composition, and blur create an image that is only of the taco.

Get Your Geek On with White Balance and ISOs
Food photography presents it’s own unique set of challenges, especially for people like us who eat our food in real life places like restaurants (not photography studios). As you can see in the picture above, the real life lighting was atrocious! And yet this light is typical of indoor, dimly lit restaurants. This kind of light is so yellow, in fact, that it will fool virtually any camera into taking a picture that looks like this. The answer is white balance.
The best way to adjust white balance is to shoot in RAW format. With a RAW file you can set the white balance later and it’s as easy as that. If you can’t shoot RAW (not all cameras have it), you’ll have to manually set the white balance before you take the picture. It will take some trial and error with the settings to get the color you really want. Read your camera’s manual to learn how to set white balance, and don’t forget to change it back to AUTO after you shoot your food! If your camera doesn’t let you change white balance and won’t let you shoot in RAW, try to find a window where natural daylight can give your image a better color.
Dim indoor lighting also means blurry pictures. Set a high ISO like 1600 or 3200 so your picture is sharp.
What about flash?
Flash creates harsh direct light, and that means big ugly shadows. Indoors, it’s better to bump up the ISO and allow the ambient light to illuminate your food. Outdoors, fill flash can soften the shadows created by direct sunlight. It’s counterintuitive to use flash outside and not use it inside, but it’s the best way to keep the light as even as possible and make your food look oh-so delicious.
Keep the photo editing to a minimum
Food photography just begs to be bright and cheerful – boosting the shadows and small brightness/contrast adjustments can help. Other than that leave it alone! The goal here is to shoot the food well in the first place, minimizing the work you need to do later.
You don’t need to spend a bunch of money
Buy everything used. A used entry level DSLR gives you everything you need to create professional looking food photographs. Pick up a decent low light lens like a 50mm f1.8 or the Tamron 17-50mm f2.8 and you’re set! When you get home you can do your photo editing work in free programs like Google’s Picasa.
These guidelines are easy. The hard part? The tremendous discipline you’ll need to take your pictures before you take your first bite. But dig deep for inner personal strength, and you’re well on your way to taking pro looking pictures of your favorite foods.


12 Comments
Ed Graham
January 5, 2013 at 12:11 pmThanks Mark, yeah it’s just something you’ve got to force yourself to do (I sill have a hard time with it!)
Mark Wiens
December 16, 2012 at 10:04 amFood photography is a lot of fun, and these are fantastic tips. I formerly found it challenging to photograph mouthwatering food prior to devouring it, but now I’ve become accustomed to taking pictures before everything I eat, so it’s just part of every meal!
Ed Graham
December 12, 2012 at 12:52 amI’m glad you guys are liking the tips!
Deb
December 10, 2012 at 10:41 amGreat tips. I sift through Instagram and see so many bad food photos. More people need to read posts like these. Cheers.
pamela
November 30, 2012 at 8:15 pmI love taking photos of food – especially on vacation, like a cruise. I struggle with the lighting, thanks for the great hints!
Jessica Festa
November 28, 2012 at 12:47 pmLove this post! I’m absolutely printing this out to take with me when I go out to eat with my DSLR :) Thanks for the tips!
Gerard ~ GQ trippin
November 27, 2012 at 6:54 pmThank you for helping rid the world of bad food fotos. :) Good simple tips.
Laurence
November 18, 2012 at 2:09 amGreat tips.. although I usually fall into the trap of eating the food before remembering to photograph it :)
pointsandtravel
November 15, 2012 at 11:20 pmgreat tips Ed!
Ed Graham
November 14, 2012 at 8:11 pmThanks Jennifer! That’s so exciting you’re headed to the UAE, take lots of pics!
Adam
November 14, 2012 at 11:41 amGreat tips! I recently bought a 50mm 1.8 lens and have been experimenting quite a bit with food photography. This will come in handy, thanks!
Jennifer
November 13, 2012 at 8:48 pmGreat food photography tips, Ed! We will have to try some of these tips out on our trip to the UAE next week. I know we’ll want to capture some great food photos there!